 |
| Avid tips and tricks for a more efficient workflow. |
This week's collection of
Avid Editing Tips and Tricks is the fifth part of the series. This collection of tips and tricks contains an updated tip from a DV Fanatics reader, an editor at 60 Minutes. As always, if you have any comments or suggestions, you can reach me through the comments of this blog, through
Google+ or
LinkedIn.
As always, keep in mind that I work on an
Avid Media Composer on the Mac. If you are using Windows, keep in mind that the COMMAND key on the Mac does what the CTRL key does on Windows and the OPTION key on Mac is the same as the ALT key on Windows.
- Creating a Sequence of Stills with Dissolves (UPDATED) - In Avid Tips and Tricks - Part IV, we spoke about adding the needed handles for dissolves by batch importing the images with a new length. This tip, suggested by a DV Fanatics reader, provides the same result in less time. Import your images at a duration that includes material for the dissolves and the duration the image will remain on screen. See Avid Tips and Tricks - Part IV for information on how to set your frame import duration.
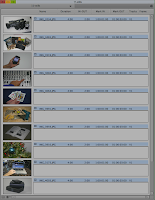 |
| An Avid bin in Script View. |
Once the images are imported, put your bin in Script View. With the bin in Script View, select all of the clips in the bin and use the Step Forward 10 Frames key on your keyboard (usually the 2 key) to advance the clip so there is enough material for a transition effect. Use the Mark IN key on the keyboard (usually the I key) to set an in point on all the clips. Use the Step Forward 10 Frames key again to advance the clip the amount you want it to remain on screen and hit the Mark OUT key on the keyboard (usually the O key). Arrange the clips by dragging them up and down in the bin however you want them to appear in the sequence. The top clip in the bin is the first clip in the sequence.
Drag the clips to your empty timeline to create a sequence and add a dissolve to all transitions IN to OUT. How you go about doing this is described in Avid Tips and Tricks - Part IV.
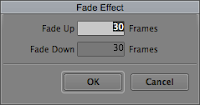 |
| Avid Fade Effect dialog. |
Add Dissolves to Titles and Alpha Graphics - In the past I used to prefer using the Fade Effect feature on Titles and Alpha Graphics. This feature made it possible to add a dissolve without adding another effect that needed rendering.
The problem is when you need to trim the Title or Alpha Graphic. When you trim the track with a Fade Effect (keyframed transparency), the duration of the fade effect changes relative to the changed duration of the segment in the timeline. For instance if I do a 30 frame Fade Effect on a 10 second title and then trim that title to 5 seconds, the new segment will now have a 15 frame fade up/down. To ensure my dissolve duration doesn't change, I add dissolve effects to my Titles and Alpha Graphics.
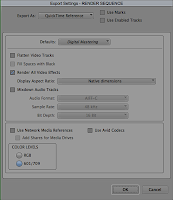 |
| Avid Export Settings window. |
Rendering Multiple Sequences - A lot of times I have projects that require me to have multiple sequences that I'm working on. I find it very time-consuming to load each sequence and render each individually.
I recently started using a much quicker technique. I've created an Export Setting called "RENDER SEQUENCE". This is a QuickTime Reference movie setting with nothing selected but "Render All Video Effects". Now when I want to render all of my sequences, I select them all in a Bin, choose Export and make sure this setting is selected. I save the tiny Quicktime movie exports to a folder that I clean out from time to time.
- JKL Scrub - Although you can map keys to whatever you want, the J key is generally shuttle backward at 30, 60, 90, 150 and 240 fps, the K key is generally the pause key and the L key is usually shuttle forward at the same speeds as the J key. In addition to using the J and K keys to shuttle backward and forward, holding the K key while pressing the J or L keys will scrub the video at 8 fps.
- Timeline Navigation - Most people know that COMMAND-CLICK in timeline snaps to the head of an edit, but did you know that COMMAND-OPTION-CLICK in the timeline snaps to the tail of an edit? This is great for setting an OUT point at the end of a segment in the timeline.
Thank you Scott for the update to Creating a Sequence of Stills with Dissolves. I hope to hear more suggestions from readers in the future.


No comments:
Post a Comment