 |
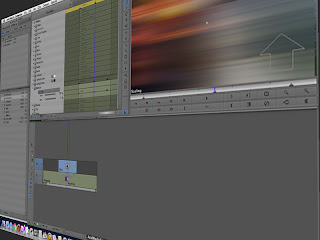
| The Avid Effects Editing window. |
This past summer I did a blog on
Avid Editing Tips and Tricks which was quite popular, so I thought it would be good to do another blog on helpful tricks. This week we'll talk about constructing different transition effects, in the
Avid Media Composer, either to hide the transition or to stylize it.
This collection of tricks is a little more involved than last time. I hope they come in handy.
- Building Titles Externally - Instead of creating titles in the Tittle Tool, create titles in Photoshop and import the Photoshop file directly. Any updates that are needed can be made in the Photoshop file, saved and batch imported. Photoshop allows for more options when creating titles and if the title is used in multiple parts of the sequence, all instances can be updated at once by the batch import.
-
 |
| Timeline for Page Peel. |
Video on the Back of a 2D Page Peel - If you want a texture on the back of a 2D page peel effect to sell the look of a page turn, this is a tip will show you how. If you have the outgoing and incoming video on V1 in a sequence, drag the outgoing video to V3. Trim the video on V3 back the number of frames you want your transition to last. Go back to the transition point and insert an "Add Edit" on V3. Add a Peel in the flavor you prefer to the segment on V3 that overlaps the outgoing video. Add a keyframe to the first frame of the effect and set the Level to 0. Add a keyframe to the last frame of the effect and set the Level to 100. Add the video you want to be on the back of the Page Peel onto V2, make sure it is the same length as the segment with the Peel effect on V3. If you enter the Effect Mode with the effect segment on V3 selected, you can drag the effect icon from the effect editor directly to the segment on V2. This will use the same effect parameters as are used on V3. Since this is a real-time effect, no rendering is required.
-
 |
| Timeline for Whip Pan. |
Whip-pan Transition - To achieve the impression of a whip-pan for a transition, it will require two layers. Start by adding a Left to Right Push (or Right to Left, depending upon your preference) on a transition on V1. Make sure the duration is something short, like 10 frames. Move to 5 frames before the transition and insert an "Add Edit" on an empty V2. Insert another "Add Edit" on V2 5 frames after the transition. Add a 3D Warp effect to the 10 frame segment you created on V2. Go into the Effect Editor and locate the "Defocus" parameter, change it to "FG Only". Before you add any keyframes, change the Horizontal slider to 220, then add a keyframe to the first frame and the last frame. This can be either to all parameters or just the active parameter, for this effect it doesn't really matter. Once done, add a keyframe that lines up with the transition on V1. Set the Horizontal slider to 255. Again, since this is a real-time effect, no rendering is required.
- Softening Jump Cuts - This one is from a PBS editor (thanks Steve). If you have a jump cut in a talking head and the shot doesn't change too drastically at the cut, use a 7 frame fluid morph transition to soften the jump cut. A lot of times I will use this technique to remove an "Umm" from what is being said. These effects will need to be rendered, but since the duration is so small, they render in no time.
Please chime in if you have any additional tricks or if you have comments about the ones I've presented here.


No comments:
Post a Comment